
Proper maintenance is essential to keep your Shark Robot Vacuum performing at its best and ensuring a clean and hassle-free home environment. Owning a Shark Robot Vacuum offers unparalleled convenience in automating your floor cleaning tasks, but like any household appliance, it requires regular upkeep to maintain its efficiency. In this guide, we will walk you through the simple yet crucial process of emptying your Shark Robot Vacuum, highlighting the key steps and tips to ensure a seamless cleaning experience. Let’s dive into the details of how to properly empty your Shark Robot Vacuum and keep it running like new.
Understanding Your Shark Robot Vacuum
When it comes to the world of robot vacuums, Shark offers a variety of models to suit different cleaning needs and preferences. Before delving into the maintenance process, it’s essential to have a solid grasp of your Shark Robot Vacuum’s specifics. Let’s explore the key aspects you should be aware of:
Types and Models of Shark Robot Vacuums: Shark has an array of robot vacuum models, each designed with unique features to cater to various cleaning requirements. Whether you’re looking for a basic yet efficient model or a more advanced version with smart technology integration, Shark has options to choose from. Familiarizing yourself with your specific Shark Robot Vacuum model is the first step toward effective maintenance.
Components and Features Overview: Understanding the components and features of your Shark Robot Vacuum is crucial for efficient operation and maintenance. Typical components include the main body, dustbin, brush rolls, sensors, and wheels. Additionally, features like Wi-Fi connectivity, mapping capabilities, and different cleaning modes may be present in advanced models. Knowing how these components and features work together will help you appreciate the technology behind your vacuum and maintain it effectively.
A Step-by-Step Guide to Efficiently Emptying Your Shark Robot Vacuum
Emptying your Shark Robot Vacuum is a simple yet crucial maintenance task to ensure its continued efficient operation. Follow these steps for a quick and efficient emptying process:
Step 1: Prepare Your Workspace
- Ensure your vacuum is turned off and unplugged from the charging station for safety.
- Choose a well-ventilated area to minimize dust exposure.
- Gather the necessary tools and materials: a trash bag or bin, a clean cloth or sponge, and any replacement filters or accessories you may need.
Step 2: Locate the Dustbin
- Refer to your vacuum’s user manual to find the dustbin’s exact location. It’s typically located at the back or underneath the unit.
Step 3: Open the Dustbin Compartment
- Follow the manufacturer’s guidelines for opening the dustbin compartment. Some models require a button press or lever release to access the dustbin.
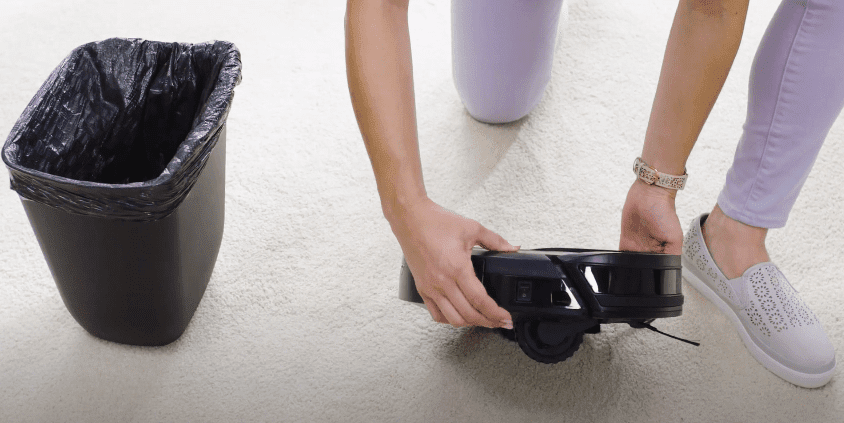
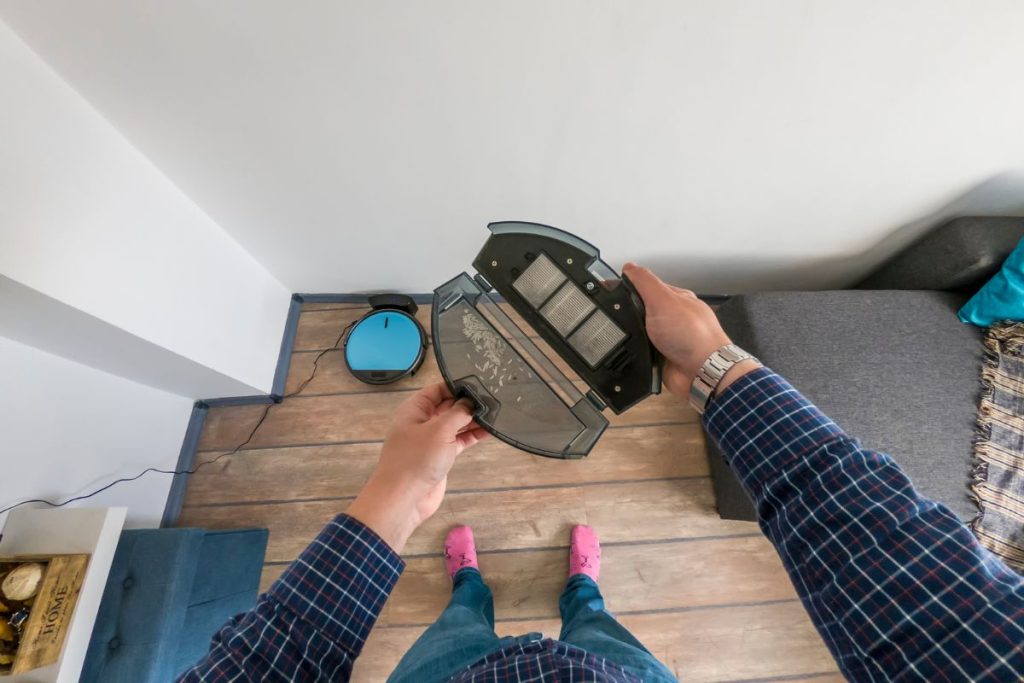
Step 4: Remove the Dustbin

- Gently pull out the dustbin from its housing. Be cautious not to spill any debris during this process.
Step 5: Empty the Dustbin
- Hold the dustbin over your trash bag or bin.
- Empty the contents by shaking or tapping the dustbin to dislodge the debris. You can also use a clean cloth or sponge to wipe the inside of the dustbin for thorough cleaning.
Step 6: Clean the Dustbin
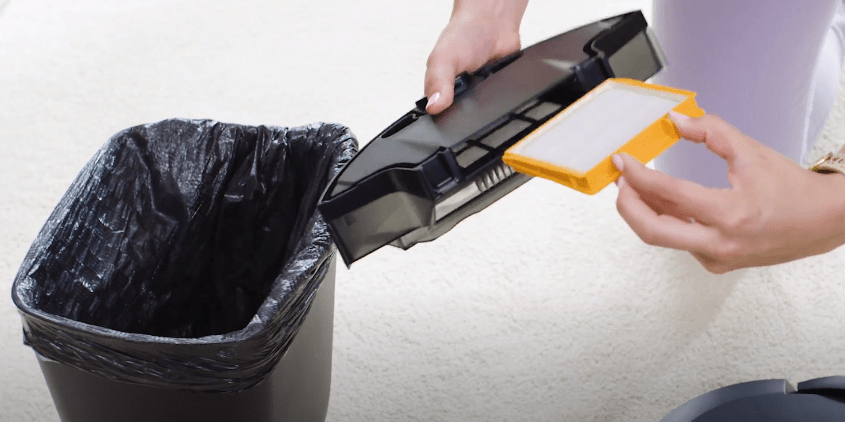
- If needed, rinse the dustbin with water and allow it to dry completely before reassembly. Ensure it’s completely dry to prevent mold or odors.
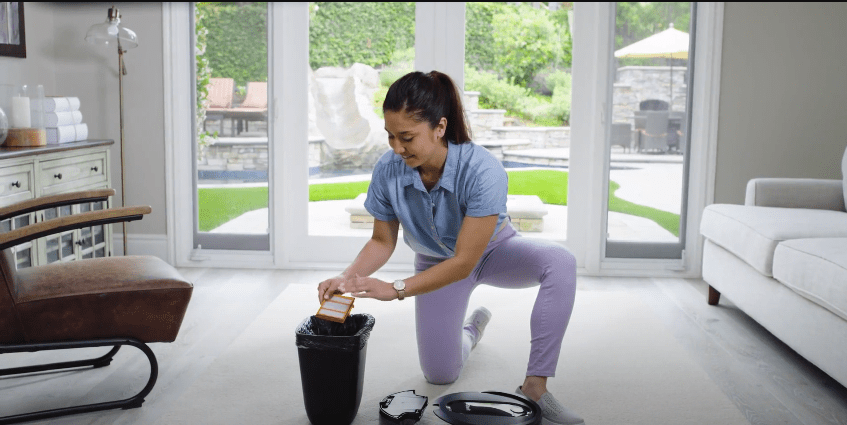
Step 7: Replace the Dustbin
- After ensuring the dustbin is empty and clean, reinsert it into the vacuum’s housing.
- Secure it in place following the user manual instructions. Ensure it clicks or locks into position.
Step 8: Wipe Down the Vacuum
- Use a clean cloth or sponge to wipe down the exterior of the vacuum, especially the sensors and wheels, to remove any dust or dirt buildup.
Step 9: Dispose of Debris
- Dispose of the collected debris in the trash bag or bin. Ensure it’s properly sealed to prevent dust from escaping.
Step 10: Perform Routine Maintenance
- Consider performing other routine maintenance tasks, such as cleaning filters and inspecting brushes and rollers, while you have the vacuum in a maintenance mindset.
By following these step-by-step instructions, you’ll efficiently empty your Shark Robot Vacuum, maintaining its performance and ensuring a cleaner home environment. Regularly incorporating this maintenance task into your cleaning routine will help your robot vacuum operate at its best.
Safety Precautions
While vacuum maintenance may seem like a routine task, it’s crucial to prioritize safety throughout the process. Here, we’ll emphasize the significance of safety when dealing with your Shark Robot Vacuum and outline the necessary safety gear and precautions to ensure a secure maintenance routine.
Importance of Safety When Dealing with Vacuum Maintenance: Safety should always be at the forefront when handling any household appliance, including your Shark Robot Vacuum. Here’s why it matters:
- Electrical Safety: Your robot vacuum operates on electricity, so avoiding electrical hazards is paramount. Mishandling components or performing maintenance tasks improperly can lead to electrical accidents.
- Health and Hygiene: Robot vacuums collect dust, debris, and potentially allergenic particles. Proper safety measures prevent exposure to these materials, which could cause health issues if mishandled.
- Preventing Accidents: Robot vacuums move autonomously, and inadvertently stepping on or tripping over them during maintenance can lead to accidents. Safety precautions help minimize such risks.
Necessary Safety Gear and Precautions: To ensure a safe vacuum maintenance process, consider the following safety gear and precautions:
- Turn Off and Unplug: Before any maintenance, turn off your Shark Robot Vacuum and unplug it from the power source to prevent accidental activation.
- Protective Gear: Wear appropriate protective gear, including gloves and a mask, especially if you’re dealing with a dirty or dusty dustbin.
- Clear Workspace: Ensure the area where you’ll be working is well-lit and free from obstacles or tripping hazards. Remove any objects that could interfere with the vacuum or your movements.
- Read the Manual: Familiarize yourself with the manufacturer’s instructions and safety guidelines provided in your Shark Robot Vacuum’s user manual.
- Use Genuine Parts: When replacing or cleaning components, use genuine Shark replacement parts and accessories to maintain the vacuum’s integrity and safety standards.
- Regular Maintenance: Consistently perform routine maintenance tasks, such as cleaning filters and brush rolls, to prevent clogs and overheating.
- Keep Children and Pets Away: Ensure that children and pets are safely away from the maintenance area to prevent accidents or injury.
By prioritizing safety and adhering to these precautions, you can confidently maintain your Shark Robot Vacuum without compromising your well-being or the appliance’s functionality.
Scheduled Maintenance Routine
Establishing a regular maintenance schedule for your Shark Robot Vacuum is the key to keeping it in optimal working condition and extending its lifespan. In this section, we will guide you on creating a routine maintenance schedule and highlight the numerous benefits that come with consistent upkeep.
Creating a Regular Maintenance Schedule:
- Frequency: Determine how often you’ll perform maintenance tasks. Consider factors such as the vacuum’s usage, the level of dirt and debris in your home, and the manufacturer’s recommendations. A general guideline is to perform basic maintenance tasks like emptying the dustbin and cleaning the filters after each cleaning cycle, while more in-depth maintenance, such as inspecting brushes and rollers, can be done on a monthly basis.
- Use a Calendar: Create a schedule on your calendar or set reminders on your smartphone or tablet. This will help you stay organized and ensure that maintenance tasks don’t get overlooked.
- Maintenance Checklist: Develop a checklist outlining the specific tasks you need to perform during each maintenance session. This could include emptying the dustbin, cleaning filters, inspecting brushes, and addressing any potential issues like clogs.
- Record Keeping: Keep a record of when you last performed maintenance tasks and note any observations or issues you encountered. This information can be valuable for troubleshooting or identifying patterns in your vacuum’s performance.
Troubleshooting Common Issues
As a responsible owner of a Shark Robot Vacuum, it’s essential to be prepared for common issues that may arise during its operation. This section will guide you in addressing these problems and provide insights into when it’s best to seek professional assistance.
Addressing Common Problems and Their Solutions:
- Vacuum Not Turning On: If your robot vacuum doesn’t start, check if it’s properly charged. Ensure the battery is connected, and the charging station is plugged in and functioning. If the problem persists, consult your user manual for reset instructions.
- Poor Cleaning Performance: If the vacuum is not picking up dirt effectively, start by cleaning the brushes and rollers. Ensure that they are free from debris and properly connected. Also, check for clogs in the dustbin or vacuum pathways.
- Random or Inefficient Cleaning: If the vacuum seems to be cleaning haphazardly or missing areas, verify that its sensors are clean and unobstructed. Clear the vacuum’s path of obstacles and ensure the area is well-lit.
- Frequent Stalling or Getting Stuck: If the vacuum frequently gets stuck on obstacles or in tight spaces, clear the area of potential obstructions. You may need to use boundary markers to restrict its access to certain areas.
- Excessive Noise: Unusual noises may indicate a foreign object stuck in the brush rolls or wheels. Inspect and clean these components thoroughly. If the noise persists, consult your user manual or contact customer support.
- Wi-Fi Connectivity Issues: If you’re experiencing problems with connecting your vacuum to your home’s Wi-Fi network or using its app, ensure your Wi-Fi is functioning correctly and that you’ve followed the setup instructions in the user manual.
Conclusion
In conclusion, maintaining your Shark Robot Vacuum is not just about convenience and cleanliness—it’s also about responsible stewardship of the environment. Through proper maintenance, scheduled upkeep, and environmentally conscious vacuuming practices, you can maximize the performance and lifespan of your vacuum while reducing your carbon footprint.
By applying the knowledge gained in this guide, you not only ensure a cleaner and healthier living space but also contribute to a more sustainable future. Remember, small steps towards eco-friendly cleaning can collectively make a significant impact on our planet. So, embrace the maintenance routines, troubleshoot issues with confidence, and vacuum with a green mindset. Your home and the environment will thank you.
FAQs (Frequently Asked Questions)
we address common questions and concerns regarding the maintenance of your Shark Robot Vacuum, providing you with helpful answers to ensure a smooth and effective cleaning experience.
Q1: How often should I empty the dustbin of my Shark Robot Vacuum? A1: It’s advisable to empty the dustbin after each cleaning cycle to maintain optimal performance. If you have pets or a particularly dusty environment, more frequent emptying may be necessary.
Q2: Can I wash the dustbin and filters? A2: Dustbins and filters are typically designed to be rinsed with water or wiped clean. Refer to your user manual for specific cleaning instructions, as it may vary by model.
Q3: What should I do if my vacuum gets stuck frequently? A3: Clear the area of obstacles and consider using boundary markers to restrict the vacuum’s access to certain areas. Regular maintenance, including sensor cleaning, can also help prevent frequent stalling.
Q4: How do I replace worn-out brush rolls and filters? A4: Replacement brush rolls and filters are available from the manufacturer. Consult your user manual for guidance on replacing these components, and ensure you use genuine Shark replacement parts for optimal performance.
Q5: Why is my Shark Robot Vacuum not connecting to Wi-Fi? A5: Check your Wi-Fi network and ensure it’s functioning correctly. Verify that you followed the setup instructions in your user manual. If issues persist, contact Shark’s customer support.
Additional Resources for Further Assistance:
If you require further assistance or have specific questions about your Shark Robot Vacuum, consider these resources:
- Shark Customer Support: Reach out to Shark’s customer support team via their website or contact information provided in your user manual for personalized assistance.
- Online Communities: Join online forums or social media groups dedicated to robot vacuum owners. These communities often provide valuable tips, troubleshooting advice, and user experiences.
- Manufacturer’s Website: Visit the official Shark website for user manuals, video tutorials, and additional resources related to your specific vacuum model.
By exploring these FAQs and additional resources, you’ll be better equipped to address common concerns and make the most of your Shark Robot Vacuum maintenance routine.